Contour Like a Pro in 2025: Your Ultimate Face Shape Guide
Advertisements
How to contour like a pro in 2025 involves understanding your face shape and using the right makeup techniques to enhance your features, creating a sculpted and defined look that complements your unique bone structure.
Ready to master the art of contouring and sculpt your face like a pro in 2025? This makeup tutorial breaks down the techniques for every face shape, ensuring a flawless, customized finish.
Advertisements
Understanding the Basics of Contouring
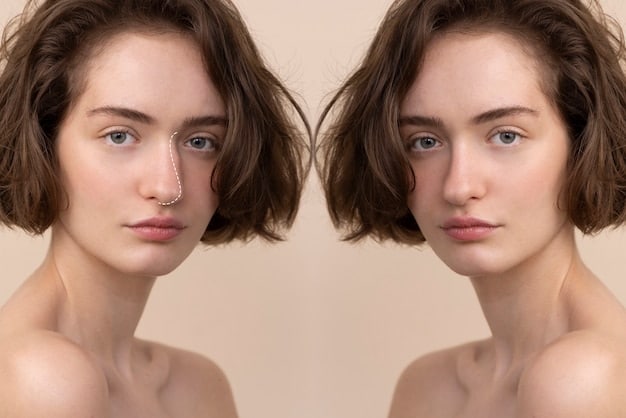
Contouring is a makeup technique that uses shadows and highlights to define and sculpt the face. By strategically applying darker shades to areas you want to recede and lighter shades to areas you want to bring forward, you can create the illusion of higher cheekbones, a slimmer nose, or a more defined jawline.
The Importance of Shade Matching
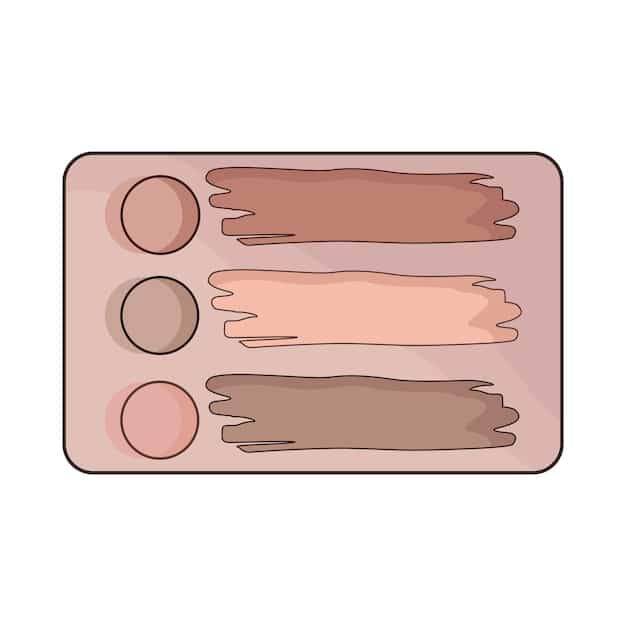
Choosing the right contour shade is crucial for achieving a natural-looking result. Opt for a shade that is two to three shades darker than your skin tone and has a cool undertone to mimic a natural shadow.
Essential Tools for Contouring
Having the right tools can make a world of difference in your contouring technique. Some essential tools include:
- Contour Brush: An angled brush is perfect for applying contour to the hollows of your cheeks.
- Highlight Brush: A smaller, tapered brush is ideal for applying highlighter to the high points of your face.
- Blending Brush: A fluffy brush is essential for blending the contour and highlight seamlessly into the skin.
Understanding these basics sets the stage for tailoring your contour to your specific face shape. With the right shades, tools, and techniques, you can enhance your natural features and create a sculpted, defined look.
Identifying Your Face Shape
Before diving into specific contouring techniques, it’s essential to determine your face shape. Different face shapes benefit from different contour placements to enhance their natural features.
Common Face Shapes
Here are some of the most common face shapes:
- Oval: The face is longer than wide, with a rounded forehead and jawline.
- Round: The face is nearly as wide as it is long, with soft, rounded features.
- Square: The face has a strong, angular jawline and a broad forehead.
- Heart: The face is wide at the forehead and temples, tapering to a narrow chin.
- Diamond: The face is narrow at the forehead and chin, with wide cheekbones.
How to Measure Your Face
To accurately identify your face shape, take a few measurements:
- Measure the width of your forehead at the widest point.
- Measure the width of your cheekbones.
- Measure the width of your jawline.
- Measure the length of your face from your hairline to your chin.
By comparing these measurements and observing your facial features, you can determine which face shape best describes you. Knowing your face shape is the first step toward a personalized contouring routine that enhances your unique beauty.
Contouring for Oval Faces
Oval faces are considered to be the most balanced face shape, so the goal of contouring is to enhance the natural symmetry and definition without drastically altering the proportions. Here’s how to contour an oval face:
Contour Placement
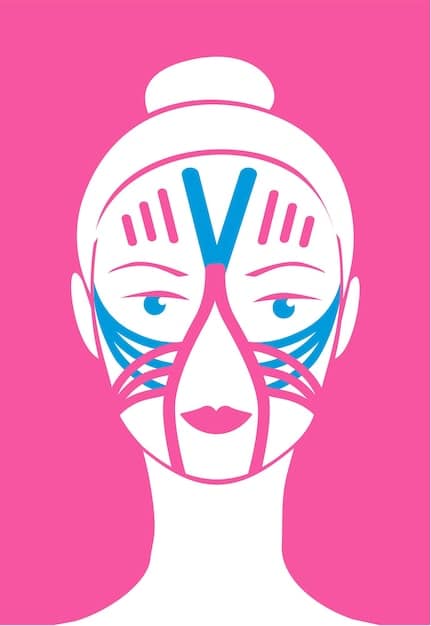
Apply contour along the hollows of your cheeks, starting from your ear and blending towards the corner of your mouth. Add a touch of contour to the temples to add dimension to the forehead.
Highlight Placement
Apply highlighter to the high points of your cheeks, the bridge of your nose, the center of your forehead, and your chin to bring these areas forward and enhance your features.
Blending is Key
Blend the contour and highlight seamlessly into the skin to avoid harsh lines and create a natural-looking finish. Use a fluffy blending brush and circular motions to achieve a smooth, airbrushed effect.
Contouring an oval face is all about enhancing the natural balance and symmetry. By strategically placing contour and highlight, you can create a defined, sculpted look that complements your features. With practice and the right techniques, you’ll be able to achieve a flawless finish every time.
Contouring for Round Faces
Round faces often lack definition, so the goal of contouring is to create the illusion of higher cheekbones and a slimmer face. Here’s how to contour a round face:
Creating Definition
Apply contour along the sides of your forehead, the hollows of your cheeks, and along the jawline to add definition and structure to the face.
Highlighting the Center
Apply highlighter to the center of your forehead, the bridge of your nose, and the center of your chin to draw attention to the center of the face and create a lengthening effect.
Avoid Harsh Lines
Be sure to blend the contour and highlight thoroughly to avoid harsh lines and create a natural-looking finish. Use a fluffy blending brush and circular motions to soften the edges and create a seamless transition.
Contouring a round face involves creating the illusion of angles and definition. By strategically placing contour and highlight, you can transform your look and create a more sculpted, defined appearance. Remember, the key is to blend seamlessly and avoid harsh lines.
Contouring for Square Faces
Square faces are characterized by a strong, angular jawline and a broad forehead. The goal of contouring is to soften these angles and create a more balanced, oval-shaped appearance. Here’s how to contour a square face:
Softening the Jawline
Apply contour along the corners of your forehead and along your jawline to soften the angles and create a more rounded appearance.
Highlighting the High Points
Apply highlighter to the center of your forehead, the high points of your cheeks, and the center of your chin to draw attention to these areas and create a lifting effect.
Blending for a Seamless Look
Blend the contour and highlight thoroughly to soften the lines and create a natural-looking finish. Use a fluffy blending brush and circular motions to blend the products seamlessly into the skin.
Contouring a square face involves softening the angles and creating a more balanced appearance. By strategically placing contour and highlight, you can transform your look and create a more sculpted, feminine appearance. Remember to blend thoroughly for a seamless, natural-looking finish.
Contouring for Heart-Shaped Faces
Heart-shaped faces are wide at the forehead and temples and narrow at the chin. The goal of contouring is to balance the wider forehead with the narrower chin and create a more symmetrical appearance. Here’s how to contour a heart-shaped face:
Balancing Proportions
Apply contour along the sides of your forehead, near the temples, to minimize the width of the forehead. Add a touch of contour to the tip of your chin to create the illusion of a more balanced jawline.
Highlighting the Cheekbones
Apply highlighter to the high points of your cheeks to accentuate your cheekbones and create a lifting effect. Avoid highlighting the forehead, as this can emphasize the width.
Blending for a Natural Finish
Blend the contour and highlight thoroughly to soften the lines and create a natural-looking finish. Use a fluffy blending brush and circular motions to blend the products seamlessly into the skin.
Contouring a heart-shaped face involves balancing the wider forehead with the narrower chin. By strategically placing contour and highlight, you can create a more symmetrical, balanced appearance. Remember to blend thoroughly for a seamless, natural-looking finish.
Advanced Contouring Tips for 2025
As makeup trends evolve, so do contouring techniques. In 2025, the focus is on natural-looking contour that enhances your features without appearing overly sculpted.
Cream vs. Powder Contouring
Cream contours offer a more natural, dewy finish, while powder contours are better for setting makeup and creating a matte look. Choose the formula that best suits your skin type and desired finish.
Strobing and Highlighting Trends
In 2025, strobing (highlighting without contouring) is gaining popularity. Experiment with different highlighting techniques to create a luminous, glowing complexion.
- Liquid Highlighters: These provide a dewy, radiant glow.
- Powder Highlighters: These offer a more subtle, diffused highlight.
Contouring for Different Skin Tones
Choose contour shades that complement your skin tone. Fair skin tones should opt for light, cool-toned shades, while deeper skin tones can use richer, warmer shades.
Staying up-to-date with the latest contouring trends and techniques can help you achieve a flawless, modern look. Experiment with different products, tools, and placements to find what works best for your unique features and skin tone.
| Key Point | Brief Description |
|---|---|
| ✨ Face Shape | Identify your face shape for tailored contouring. |
| 🎨 Shade Matching | Choose contour 2-3 shades darker than your skin. |
| 🖌️ Tools | Use angled, highlight, and blending brushes. |
| 🔄 Blending | Seamless blending is key for a natural look. |
Frequently Asked Questions
▼
For fair skin, choose a light, cool-toned contour shade that is only one or two shades darker than your natural skin tone. This ensures a subtle, natural-looking shadow.
▼
While bronzer can add warmth to the skin, it is not ideal for contouring. Contouring requires a cool-toned shade to mimic shadows, while bronzer is typically warm-toned.
▼
To prevent contour from looking muddy, use a light hand when applying the product and blend thoroughly. Avoid using too much product at once, and gradually build up the intensity.
▼
A fluffy blending brush is ideal for blending contour seamlessly into the skin. Look for a brush with soft bristles and a tapered shape to easily blend the product without harsh lines.
▼
Clean your contour brushes at least once a week to prevent bacteria buildup and ensure smooth, even application. Use a gentle brush cleanser and allow the brushes to air dry completely.
Conclusion
Mastering the art of contouring can transform your makeup routine and enhance your natural features. By understanding your face shape, choosing the right products and tools, and practicing your blending technique, you can achieve a sculpted, defined look that complements your unique beauty. Keep experimenting with different techniques and trends to find what works best for you.