How to Apply Blush: Achieve a Natural Flush in 4 Easy Steps
Advertisements
Applying blush correctly can enhance your complexion and give you a natural, healthy-looking flush. This makeup tutorial provides a step-by-step guide on how to apply blush flawlessly in just four simple steps, ensuring a radiant and youthful appearance.
Want to achieve that perfect, natural-looking flush? This tutorial breaks down how to apply blush: A makeup tutorial for a natural, healthy flush in 4 steps, making it easy to enhance your complexion and create a radiant glow. Let’s dive in and discover the secrets to flawless blush application!
Advertisements
Understanding Blush: Types and Formulations
Blush is a makeup essential that can transform your look from dull to dazzling. Before diving into the application, it’s crucial to understand the types and formulations of blush available.
Each type offers a different finish and is suited to various skin types. Understanding these differences will help you choose the perfect blush for your desired look and skin needs.
Powder Blush
Powder blush is the most common type, known for its versatility and ease of use. It’s ideal for those with oily or combination skin as it helps to absorb excess oil and provides a matte finish.
Cream Blush
Cream blush offers a dewy, radiant finish that’s perfect for dry or mature skin. Its hydrating formula blends seamlessly into the skin, providing a natural-looking flush.
- Gel Blush: Provides a sheer, natural-looking flush.
- Liquid Blush: Highly pigmented, offering a long-lasting, vibrant color.
- Tinted Sticks: Convenient and easy to apply, perfect for on-the-go touch-ups.
Choosing the right formulation ensures your blush complements your skin type and enhances your overall makeup look. Consider your skin’s needs and the finish you desire to achieve the best results.
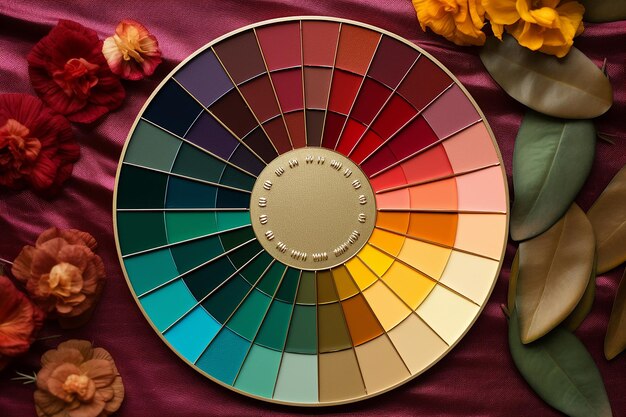
Step 1: Choosing the Right Blush Color
Selecting the right blush color is essential to complement your skin tone and achieve a natural, healthy flush. The wrong shade can make you look washed out or unnatural.
Consider your skin’s undertones and choose a blush that enhances your natural coloring. This will ensure a seamless and flattering finish.
For Fair Skin Tones
Fair skin tones typically have cool undertones, so opt for light pinks, peaches, or coral shades. These colors provide a soft, natural flush without overpowering the complexion.
For Medium Skin Tones
Medium skin tones can pull off a wide range of colors, including rose, berry, and mauve. These shades add warmth and dimension to the cheeks, enhancing the skin’s natural radiance.
- For Olive Skin Tones: Try warm bronzes or terracotta shades.
- For Dark Skin Tones: Deep berry, plum, or orange shades work best.
- Consider Undertones: Cool undertones pair well with pinks, while warm undertones suit peaches and corals.
Experimenting with different shades and undertones can help you discover the perfect blush color for your unique skin tone. Don’t be afraid to try new things and find what makes you feel confident and beautiful.
Step 2: Preparing Your Skin for Blush Application
Preparing your skin properly is crucial for a smooth and long-lasting blush application. A well-prepped base ensures that the blush blends seamlessly and looks natural.
Proper skincare and base makeup are essential for achieving a flawless finish. This step will help you create a canvas that allows the blush to shine.
Start with a Clean Canvas
Begin by cleansing your face to remove any dirt, oil, or makeup residue. This ensures that your skin is fresh and ready for makeup application.
Moisturize and Prime
Apply a moisturizer to hydrate your skin and create a smooth surface. Follow with a primer to create a barrier between your skin and makeup, helping to prolong wear.
- Apply Foundation: Even out your skin tone with a lightweight foundation.
- Set with Powder: Use a translucent powder to set your base makeup.
- Consider Your Skin Type: Adjust your skincare routine to suit your skin’s specific needs.
By taking the time to properly prepare your skin, you’ll create a flawless base for your blush, ensuring a natural and long-lasting finish. A well-prepped canvas is the key to a radiant and healthy-looking complexion.
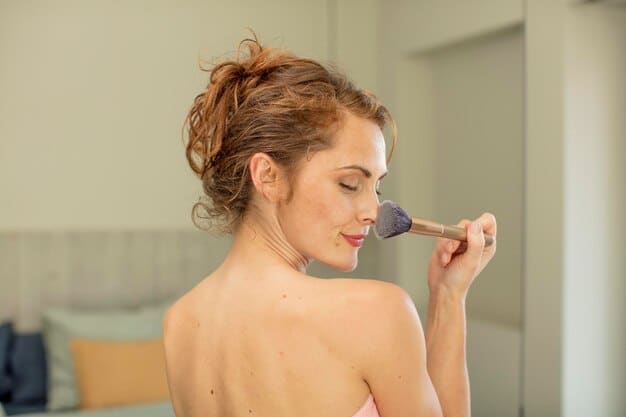
Step 3: Applying Blush with the Right Technique
The technique you use to apply blush can greatly impact the final look. Using the right brush and application method can enhance your features and create a natural-looking flush.
Different face shapes require different application techniques. Knowing your face shape and the best way to apply blush for it can make a significant difference.
Choose the Right Brush
Select a blush brush with soft, fluffy bristles and a rounded shape. This type of brush allows for even distribution of color and a seamless blend.
Smile and Locate the Apples of Your Cheeks
Smile to identify the apples of your cheeks. These are the areas where you want to apply the blush for a youthful, radiant look.
- For Round Faces: Apply blush along the cheekbones to add definition.
- For Oval Faces: Apply blush to the apples of your cheeks for a balanced look.
- Blend Thoroughly: Ensure there are no harsh lines by blending the blush into your skin.
Mastering the right application technique can transform your look, enhancing your features and creating a natural, healthy flush. Take the time to practice and refine your technique for the best results.
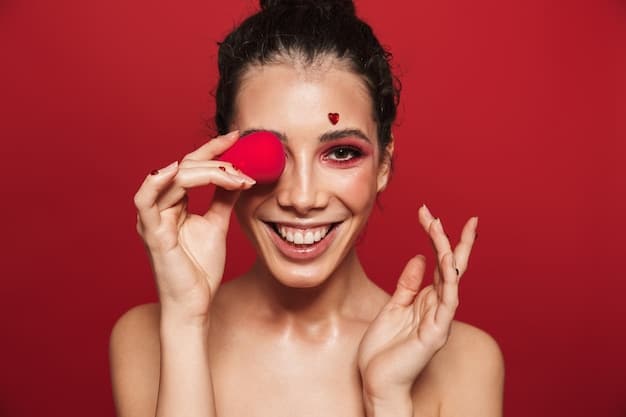
Step 4: Blending and Finishing Touches
Blending is the key to achieving a seamless and natural blush application. Proper blending ensures that the blush looks like a natural flush rather than a stripe of color on your cheeks.
Finishing touches can enhance your overall makeup look and ensure that your blush complements your other features. Pay attention to detail and perfect your technique for a flawless finish.
Blend, Blend, Blend
Use a clean brush or your fingertips to blend the edges of the blush into your skin. This creates a soft, diffused effect that looks natural and seamless.
Check Your Look in Natural Light
Step outside or near a window to check your blush application in natural light. This helps you identify any areas that need more blending or color correction.
- Apply Highlighter: Add a touch of highlighter to your cheekbones for extra radiance.
- Set with Setting Spray: Use a setting spray to lock in your makeup and prolong wear.
- Adjust as Needed: Add more blush if needed, but remember to blend thoroughly each time.
By focusing on blending and finishing touches, you can achieve a flawless blush application that enhances your natural beauty. Pay attention to the details and take the time to perfect your technique for a radiant and healthy-looking complexion.
Advanced Blush Techniques for Different Looks
Once you’ve mastered the basic blush application, you can explore advanced techniques to create different makeup looks. Experimenting with placement and color can transform your overall appearance.
From draping to sun-kissed looks, there are many ways to use blush to enhance your features and create unique effects. These techniques allow you to customize your makeup to suit your personal style and preferences.
Blush Draping
Blush draping involves applying blush along the cheekbones and temples to sculpt and lift the face. This technique creates a seamless, contoured look that enhances your bone structure.
Sun-Kissed Look
For a sun-kissed effect, apply blush across the bridge of your nose and the high points of your cheeks. This mimics the natural flush you get from spending time in the sun.
- Ombre Blush: Blend two different blush shades together for a gradient effect.
- Monochromatic Look: Use the same shade of blush on your cheeks, lips, and eyes for a cohesive look.
- Experiment with Placement: Try applying blush in different areas to see what works best for your face shape.
Exploring advanced blush techniques can help you create a variety of stunning makeup looks that enhance your natural beauty. Don’t be afraid to experiment and discover new ways to use blush to express your personal style.
| Key Point | Brief Description |
|---|---|
| 🎨 Choosing the Right Color | Select a blush color that complements your skin tone and undertones for a natural flush. |
| ✨ Preparing Your Skin | Cleanse, moisturize, and prime your skin before applying blush for a smooth and long-lasting finish. |
| 🖌️ Applying with Technique | Use a fluffy brush and smile to locate the apples of your cheeks for precise blush application. |
| 🔄 Blending and Finishing | Blend thoroughly and check your look in natural light, adding highlighter and setting spray for a complete finish. |
Frequently Asked Questions
▼
Cream blush is generally the best option for dry skin. Its hydrating formula blends seamlessly, providing a dewy and natural-looking flush while keeping the skin moisturized.
▼
Consider your skin’s undertones. Fair skin tones look great with light pinks and peaches, while medium skin tones can pull off rose and berry shades. Dark skin tones suit deep berry or orange blushes.
▼
Apply blush to the apples of your cheeks by smiling and targeting the areas that pop out. Blend the color towards your temples for a seamless and natural finish that enhances your features.
▼
Yes, you can use lipstick as cream blush in a pinch! Just dab a small amount onto your cheeks and blend quickly with your fingers or a sponge for a cohesive, monochromatic look.
▼
To make your blush last longer, start with a primer, set your foundation with powder, and then apply your blush. Finish with a setting spray to lock in the color and ensure a long-lasting finish.
Conclusion
Mastering the art of applying blush can significantly enhance your makeup routine, providing a natural, healthy flush that complements your features. By following these four simple steps – choosing the right color, preparing your skin, applying with the right technique, and blending thoroughly – you can achieve a radiant and youthful appearance effortlessly.


