Master the 4-Step Underpainting Technique for Seamless 14-Hour Foundation
Advertisements
Achieving a flawless, all-day complexion starts with mastering the Underpainting Technique for your daily beauty routine. By reversing traditional makeup order, this viral method creates a naturally sculpted look that refuses to budge.
Applying your contour, highlight, and blush beneath your base layer allows the products to blend seamlessly from within. This strategic reverse-layering process eliminates harsh lines and prevents that dreaded cakey texture after hours of wear.
If you are tired of midday touch-ups, this professional base-building method is your ultimate solution. Here is how to master the four simple steps for a radiant, 14-hour finish.
Unveiling the Power of Underpainting for Enduring Beauty
The concept of underpainting, while not entirely new to professional makeup artists, has recently surged in popularity among beauty enthusiasts seeking a more refined and durable foundation application. Its core principle lies in building dimension beneath the primary layer of foundation, creating a truly seamless effect.
This technique addresses the common desire for makeup that looks natural yet provides significant sculpting and luminosity. By applying corrective and enhancing products before foundation, the final result is a harmonious blend that appears to emanate from within the skin.
The emphasis on longevity is a key driver behind the adoption of the underpainting foundation technique. Many users report significantly extended wear times, with foundation remaining intact and fresh for upwards of 14 hours, a crucial benefit for busy individuals.
Step 1: The Strategic Application of Contour and Concealer
The initial phase of the underpainting foundation technique involves precisely placing contour and concealer. This step is fundamental to sculpting the face and addressing any areas requiring extra coverage before the main foundation application.
Cream or liquid contour products, typically one to two shades darker than your skin tone, are applied to areas you wish to recede, such as the hollows of the cheeks, jawline, and temples. A lighter, brightening concealer is then used under the eyes, on the bridge of the nose, and the center of the forehead to bring forward and illuminate.
The precision in this step is crucial; avoid heavy application. The goal is to create subtle shadows and highlights that will be softened and diffused once the foundation is applied, ensuring a natural, believable dimension.
Choosing the Right Products for Underpainting
Cream Contour: Opt for blendable, non-greasy formulas that dry down to a natural finish. Sticks or liquid contours are ideal for precise application.
Liquid Concealer: Select a formula that offers good coverage without creasing, typically one shade lighter than your skin tone for brightening.
Application Tools: Small, dense brushes or a precise beauty sponge are excellent for controlled product placement.
Proper product selection and application tools are paramount for achieving the desired effect. High-quality, blendable formulas will make the subsequent steps much easier and contribute significantly to the seamless finish of the underpainting foundation technique.
Step 2: Integrating Blush for a Natural Flush
Following the contour and concealer, the next crucial step in the underpainting foundation technique is the application of cream blush. This adds a healthy, natural flush that appears to glow from within, rather than sitting on top of the foundation.
Cream blush, in a shade that complements your natural skin tone, is dabbed onto the apples of the cheeks and blended upwards towards the temples. The warmth and dimension it provides are essential for a youthful and vibrant complexion.
Applying cream blush at this stage allows it to meld seamlessly with the other underpainted layers, creating a soft, diffused color that looks incredibly natural. This prevents any harsh lines or an overly made-up appearance.
The choice of blush shade greatly influences the final outcome. Peachy tones are excellent for warmer complexions, while berry or rosy hues complement cooler undertones. Experimentation is key to finding what works best for your individual skin tone and desired look.
Blending Techniques for Cream Blush
Stippling Motion: Use a stippling brush or your fingertips to gently press the product into the skin, building intensity gradually.
Dabbing with Sponge: A damp beauty sponge can help diffuse the color for an even softer effect, ensuring no harsh edges.
Achieving a harmonious blend of all these pre-foundation layers is vital for the success of the underpainting foundation technique. Each product should transition smoothly into the next, laying the groundwork for a truly flawless base.
Step 3: The Art of Layering Foundation for Seamless Coverage
With the contour, highlight, and blush meticulously applied, the third step involves carefully layering your chosen foundation. This is where the magic of the underpainting foundation technique truly comes to life, as the foundation acts as a veil, diffusing the underlying layers.
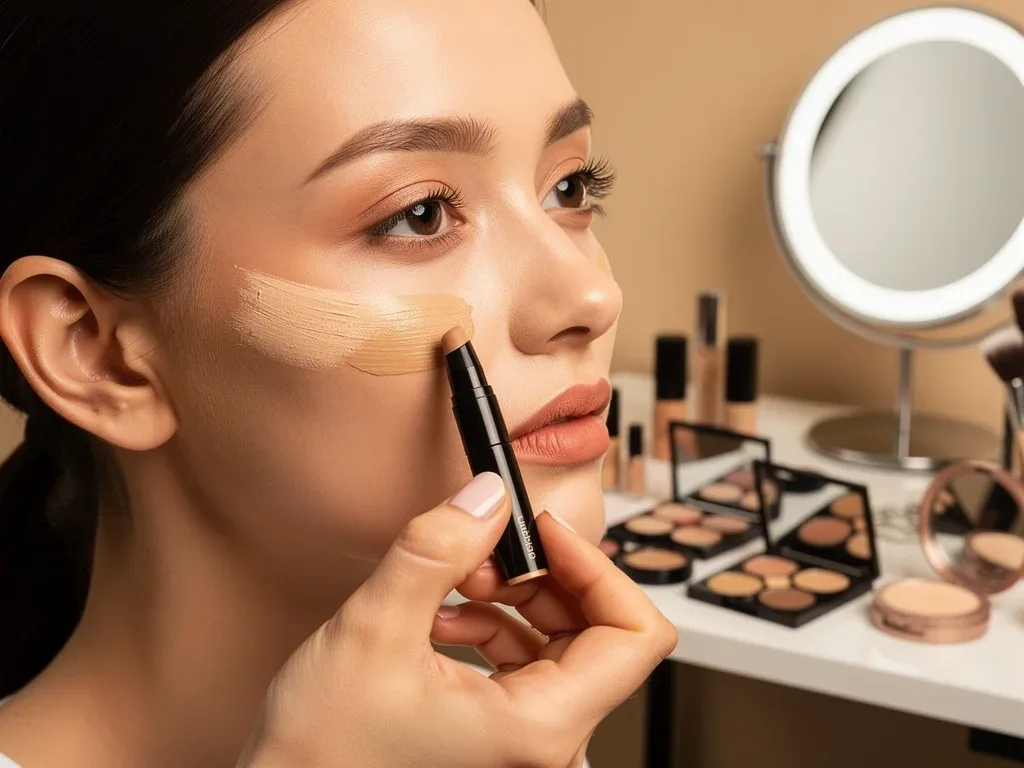
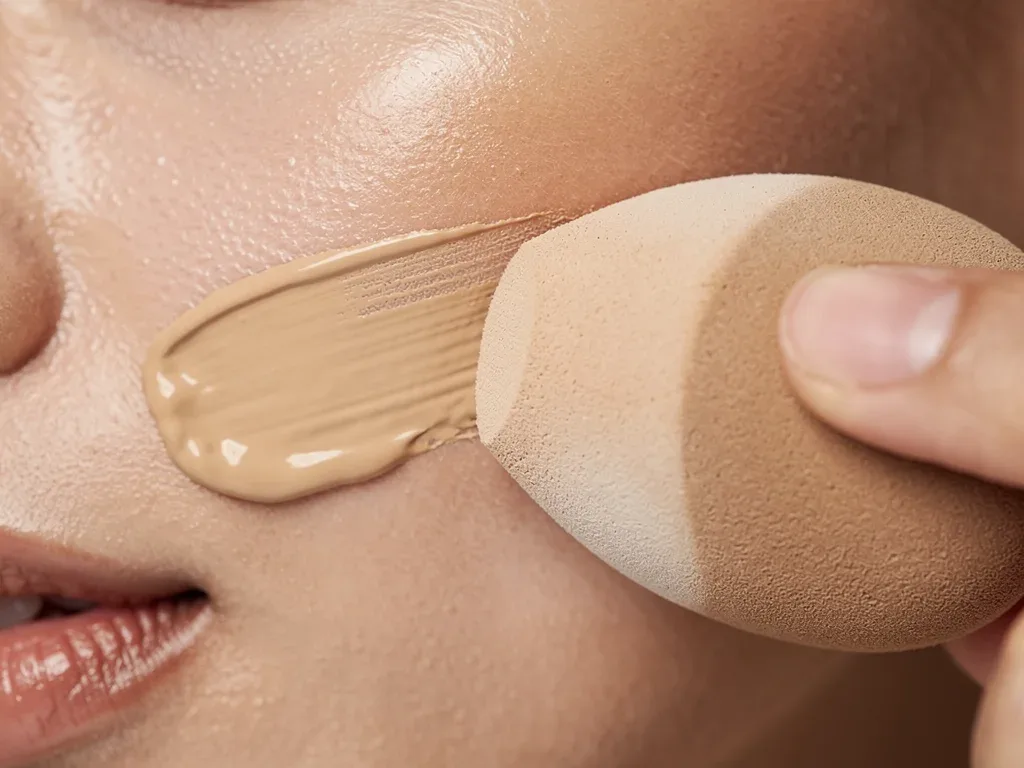
Apply a thin, even layer of liquid or cream foundation over the entire face, gently pressing it into the skin with a damp beauty sponge or a foundation brush. The goal is not to completely obscure the underpainting, but to soften and blend it, making it appear as part of your natural skin.
Start with a small amount of product and build coverage where needed, paying close attention to areas where you've applied contour and concealer. The foundation should unify the complexion while allowing the sculpted dimensions to subtly show through.
The choice of foundation texture is important. Lighter to medium coverage foundations tend to work best with the underpainting method, as they allow the carefully placed contours and highlights to remain visible. Heavy, full-coverage foundations might negate the subtle effects you've worked to create.
Step 4: Setting the Masterpiece for 14-Hour Wear
The final step in mastering the underpainting foundation technique is crucial for ensuring its promised 14-hour wear: setting the makeup. This locks everything in place, prevents creasing, and extends longevity.
Using a finely milled translucent setting powder, lightly dust the T-zone, under-eye area, and any other parts of the face prone to shine. A fluffy brush or a powder puff pressed gently into the skin can provide a smooth, matte finish without looking cakey.
For an extra layer of security, especially if you have oily skin or anticipate a long day, a setting spray can be applied. This helps to melt all the layers together, creating a more cohesive and natural finish while significantly boosting wear time.
Do not over-powder, as this can diminish the luminous effect created by the underpainting. The aim is to set strategically, ensuring that the foundation remains fresh and budge-proof throughout the day.
Tips for Maximizing Foundation Longevity
Primer Application: Start with an appropriate primer for your skin type to create a smooth canvas and enhance grip for subsequent products.
Layering Thinly: Apply all products in thin layers; heavy application can lead to creasing and breakdown over time.
Blotting Throughout the Day: Use blotting papers to absorb excess oil without disturbing your foundation, rather than adding more powder.
By diligently following these steps, the underpainting foundation technique transforms your makeup routine into an art form, delivering a truly long-lasting and impeccably sculpted look.
Why Underpainting Delivers Superior Longevity
The inherent design of the underpainting foundation technique contributes significantly to its superior longevity compared to traditional methods. By placing contour and highlight beneath the foundation, these products are less exposed to external factors that cause wear and tear.
When contour and highlight are applied on top of foundation, they can sometimes move or fade as the day progresses, especially with skin oils and environmental exposure. Underpainting essentially seals these layers, protecting them beneath the foundation.
This layering strategy also creates a more unified and robust base. Each product, from primer to contour to foundation, adheres better to the preceding layer, forming a resilient canvas that resists breakdown and maintains its integrity for extended periods.
The diffused nature of the underpainted layers also means that any slight wear is less noticeable. Harsh lines that might smudge or fade visibly are avoided, contributing to the overall illusion of seamless, long-lasting perfection.
Common Pitfalls to Avoid in Your Underpainting Journey
While the underpainting foundation technique offers remarkable benefits, there are several common mistakes that can hinder its effectiveness. Awareness and careful execution are key to avoiding these pitfalls and achieving the desired seamless finish.
One frequent error is applying too much product in the initial contour and highlight stages. Remember, these layers are meant to be subtle and diffused by the foundation. Over-application can lead to a heavy, cakey look that defeats the purpose of natural sculpting.
Another common mistake is not blending thoroughly enough before applying foundation. Each underpainted layer must be seamlessly blended into the skin before moving on. Any unblended edges will become more apparent once foundation is applied, making it difficult to correct.
Using the wrong tools can also compromise the outcome. Large, fluffy brushes are not ideal for precise contour placement. Opt for smaller, denser brushes or sponges that allow for controlled application and effective blending of each individual layer.
Additionally, choosing products that are too thick or difficult to blend can make the process challenging and result in a patchy finish. Always opt for creamy, blendable formulas that work harmoniously together for the best results in your underpainting foundation technique.
Tools and Products: Your Essential Underpainting Arsenal
Equipping yourself with the right tools and products is as important as understanding the steps of the underpainting foundation technique itself. The quality and type of your makeup arsenal significantly influence the final outcome, ensuring a smooth, blended, and long-lasting finish.
For contouring, cream sticks or liquid wands are highly recommended for their precision and blendability. These allow for targeted application to areas like the cheekbones, jawline, and nose. Brands like Fenty Beauty, Milk Makeup, and Rare Beauty offer excellent options.
When it comes to highlighting, liquid or cream highlighters that provide a soft, luminous glow are perfect for underpainting. Avoid overly glittery formulas, as the goal is a natural radiance that peeks through the foundation. Charlotte Tilbury's Hollywood Flawless Filter is a popular choice for this purpose.
For blending, a damp beauty sponge is indispensable. Its ability to seamlessly press products into the skin without disturbing previous layers is crucial. Small, dense brushes are also valuable for precise contour and concealer placement, ensuring clean lines before diffusion.
Finally, a lightweight, buildable foundation is ideal. Avoid heavy, matte formulas that might completely mask your underpainting. Look for foundations that offer a natural or satin finish, allowing your sculpted features to shine through subtly.
A good setting powder and spray are also non-negotiable for locking in your masterpiece. Translucent, finely-milled powders from brands like Laura Mercier or Givenchy, paired with a reliable setting spray, will ensure your underpainting foundation technique holds up for the full 14 hours.
Adapting Underpainting for Different Skin Types and Occasions
The versatility of the underpainting foundation technique allows for adaptation across various skin types and for different occasions, ensuring that everyone can achieve a flawless and long-lasting look tailored to their needs.
For oily skin, focus on using oil-free or mattifying primers before starting the underpainting process. Opt for cream products that have a more matte or natural finish, and ensure thorough setting with a generous, yet strategic, application of translucent powder, especially in the T-zone.
Those with dry skin should prioritize hydrating primers and cream-based products that contain moisturizing ingredients. Avoid excessive powdering and consider a dewy setting spray to maintain a fresh, luminous look throughout the day, preventing any caking or dryness.
For a natural, everyday look, use lighter hands with your contour and highlight, opting for softer shades. For special occasions or events requiring more drama, you can intensify the contour and highlight, ensuring they still blend seamlessly under your foundation for a refined, sculpted effect.
The Future of Foundation: Embracing the Underpainting Revolution
The widespread adoption and continuous refinement of the underpainting foundation technique signal a significant shift in how individuals approach their daily makeup routines. This method is not just a trend; it represents a more sophisticated and effective way to achieve a desired aesthetic.
As beauty consumers become more discerning, the demand for techniques that offer both aesthetic appeal and practical longevity continues to grow. Underpainting perfectly meets this demand, providing a foundation that looks impeccable for extended periods, adapting to busy lifestyles.
The educational aspect is also crucial; as more tutorials and expert insights become available, the technique becomes accessible to a broader audience. This democratization of professional makeup artistry empowers individuals to elevate their own beauty skills, moving beyond basic application to master complex yet rewarding methods.
This ongoing evolution in makeup application, spearheaded by techniques like underpainting, underscores a broader movement towards personalized and high-performance beauty solutions. The focus remains on enhancing natural features with intelligent, long-lasting strategies.
Key Point | Brief Description |
|---|---|
Strategic Layering | Contour, highlight, and blush applied before foundation for seamless dimension. |
Enhanced Longevity | Foundation lasts up to 14 hours by protecting underlying layers. |
Natural Finish | Diffused application avoids harsh lines, creating an 'from within' glow. |
Versatility | Adaptable for various skin types and desired makeup intensities. |
Frequently Asked Questions About Underpainting
What is the primary benefit of the underpainting technique?▼
The main benefit of the underpainting technique is achieving a seamlessly sculpted, natural-looking foundation that boasts exceptional longevity, often lasting up to 14 hours. It ensures contour and highlight appear diffused and integrated into the skin.
Can underpainting work for all skin types?▼
Yes, the underpainting technique is adaptable for all skin types. Individuals with oily skin should use mattifying primers and powders, while those with dry skin benefit from hydrating primers and cream-based products to ensure a flawless and comfortable wear.
What products are essential for effective underpainting?▼
Essential products include blendable cream contour and highlight, a complementary cream blush, and a lightweight liquid or cream foundation. High-quality blending tools, like a damp beauty sponge and dense brushes, are also crucial for a seamless application.
How does underpainting extend foundation wear time?▼
Underpainting extends foundation wear by layering contour and highlight beneath the foundation, protecting them from environmental factors and natural skin oils. This strategic layering creates a more robust and unified base that resists breakdown and fading throughout the day.
Is underpainting suitable for beginners?▼
While it may seem advanced, underpainting is highly suitable for beginners with practice. Starting with minimal product and focusing on thorough blending are key. Numerous online tutorials offer guidance, making the 4-step underpainting technique accessible to all skill levels.
Perspectives
The continued evolution and widespread adoption of the underpainting foundation technique underscore a growing demand for sophisticated yet practical beauty solutions.
As more individuals seek makeup routines that offer both aesthetic excellence and enduring performance, this method stands as a testament to intelligent product application.
Future developments will likely focus on even more user-friendly products and simplified techniques, further solidifying underpainting's place as a staple in modern beauty, continuously enhancing how we achieve and maintain flawless complexions.